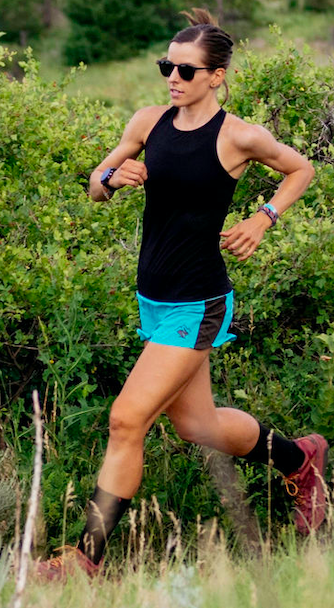
Coach Sage Canaday discusses the ‘fartlek’ workout. He’ll explain…
What a fartlek workout is
Why it’s one of his favorite types of workouts to do
A few workout examples to work with!
What Is a Fartlek Workout?
‘Fartlek’ is a Swedish word that translates to ‘speed play,’ which is fitting because it’s all about enjoying your running with unstructured intervals! A fartlek workout involves alternating between running fast and recovering at a slower pace, but without strict timing or structure. For example, you might sprint to the next lamppost or tree, then jog to catch your breath, and repeat this using various landmarks along your route. The sprint distance and recovery time can vary, making it a flexible, fun way to incorporate speed work. But overall, it’s a great way to add variety to your training while building speed and endurance.
Why The Fartlek Is a Favorite of Mine
Fartlek training doesn’t require a set pace, and there’s no need to check your GPS constantly. You run by feel and intuition, which is a key aspect of effective training—learning to read your body’s signals. You might choose to wear a heart rate monitor, or you might not. I personally love the fartlek workout because of how flexible you can make it: on an easy day, if you feel good, you might sprint on the uphills and jog the downhills, or vice versa. The intervals don’t have to be precise—whether it’s 30 seconds, 45 seconds, or a minute, what matters is that you’re getting a good heart rate spike.
In many of our Higher Running training plans for half marathons, marathons, and ultras, we incorporate fartlek workouts. You could even add a fartlek to a run spontaneously. For example, during a 20-mile or 18-mile long run, you might do some fartlek intervals in the second half.
Fartlek Workout #1
A structured example of a fartlek workout could involve six sets of three-minute hard efforts. For instance, you might run three minutes at your 10K race pace or effort, followed by a two-minute recovery jog. This workout consists of six sets of three minutes fast with two minutes easy between each, totaling 18 minutes of high-intensity work at around 85–90% of your maximum heart rate.
Including the recovery jogs, this 30-minute workout keeps your heart rate elevated for most of the session. If you check your heart rate data afterward, you’ll see spikes where your heart rate rises during the hard efforts and drops during the recovery jogs. This pattern also appears in your leg turnover, as you develop speed, stimulate fast-twitch muscle fibers, and improve running economy at your 10K pace. Furthermore, this type of workout helps improve stride rate, leg turnover, and reduce ground contact time.
Ultimately, this workout is a great way to keep your heart rate elevated over 75% of your maximum for 30 minutes with peaks over 90%. It’s an unstructured form of interval training that provides an excellent lactate threshold stimulus by helping clear lactate, similar to a tempo run.
I like to think of it as a ‘pre-VO2 max’ workout. It’s not excessively hard, and you can adjust the intensity on the fly. You don’t have to hit a strict 10K pace or specific speed; just go by feel. For example, if you’re tired from work or didn’t sleep well, you can reduce your effort instead, and this approach can be more manageable than facing tough splits on a track workout.
Fartlek Workout #2
It you are looking for a more structured, track-focused, fartlek session, you might run 400-meter repeats at 5K pace, followed by 200 meters at a “float” recovery pace. This means running 400 meters in about 90 seconds, then doing a lighter jog for 200 meters in about a minute. You could repeat this for a full 5K without stopping. Though more formal and measured, this workout follows the same principles, keeping your heart rate and speed oscillating, which provides similar benefits.
A continuous workout like this keeps you moving without stopping to catch your breath. You accelerate, ease off, and repeat, but it’s all fluid. That’s the beauty of fartlek training—you can do it on trails, up and down hills, using landmarks rather than constantly checking your watch. It’s a great lactate threshold workout that can even be added to the end of long runs.
In summary, fartleks are an excellent way to ease into more structured interval training while developing speed and running economy. They’re beneficial for any distance runner, whether training for a mile or 100 miles. Fartlek training provides a fun, low-pressure way to work on key aspects of your running fitness.
I hope this helps give you a better idea of what a fartlek workout is. Give it a try this week!
Today, Coach Sandi Nypaver is going to guide you through some strength tests that you can do at home to check whether your body is evenly balanced or if there’s anything you need to work on. Many of these tests are similar to what a physical therapist might have you do, but she’ll help you learn how to perform them yourself and understand what to look for.
At home, self-performed strength tests help to see if there’s anything you need to work on to keep your body functioning optimally. As a runner it’s important both sides of your body show up equally and this newsletter will help you do that. If you’re in pain it’s always good to go see a doctor and/or specialist, preferably one who is well trusted by runners. If there is something you need to work on (I certainly have a lot to work on!) don’t view it as a bad thing. It’s a good challenge and the process can be rewarding when you notice improvements.
Let’s get started:
🥇: The Bridge Test Alright, the first exercise is a simple glute bridge. Make sure your back is flat on the floor and keep your pelvis stable in this position. Raise your arms so they don’t assist you, and then lift your hips straight up.
What you’re checking for is whether you can maintain proper alignment of your pelvis. If you feel your pelvis drop, take note. Also, pay attention to where you feel the effort. Are you feeling it in your glutes or your hamstrings, or both? Ideally, you should feel it in your glutes, and even a little in your hamstrings. That’s a good sign.
a. Test Questions: What muscles do you feel working the most? Does your pelvis drop or can you keep it stable? Does one side feel different than the other? Do you need to work on strength and/or activation?
b. Goals: Work towards keeping your pelvis stable and having your glutes take on most of the load. It’s okay if you feel your hamstring working a little, but your hamstring should not take on more work than your glutes.
Bonus Tip: Keep your spine stable. You should not be feeling this in your lower back.
🥈: The Squat Test Now, let’s do a squat test. And note that I’m using a hiking pole here – you’ll want something similar. First, make sure your spine is neutral, and align your toes with the bar of the chair. From there, try to squat down.
What you’re checking for is whether your knees want to move forward, preventing you from going lower. If that happens, it’s a sign you’re relying too much on your quads. What you want is to get your butt back while keeping a neutral spine and maintaining a good hip hinge.
If you’re using your quads more than your glutes, you’ll struggle to go down. Instead, aim to engage your glutes and keep that hip hinge, which is important when you’re running as well.
a. Test Questions: If you place a chair or box in front of your toes, do you find it hard to squat/does it feel unnatural? What muscles do you feel working the most, your quads or glutes?
b. Goals: Get that booty back and working! You may feel your quads working, but you want to aim for a glute dominant squat. Get the hip-hinge pattern right, keeping the spine stable.
Bonus Tip: Our bodies like the neuromuscular patterns we already have formed. Some of you will be able to do this exercise without being able to apply to your running right away. Keep working at it. You’ll get there!
🥉: The Single Leg Squat This is a typical single-leg squat. The key here is to compare how each leg moves.
Now, what you want to avoid is your knee collapsing inward or moving too far out to the side. Try to keep everything aligned, engaging your glutes and even a bit of your knee as you come up.
Focus on your knee position and check if you’re using both legs in the same way. Again, you don’t want your knee to collapse inward as you squat down. Keep your legs straight and make sure you’re engaging your glutes on both the way up and down.
a. Test Questions: What muscles do you feel working the most? Does your foot/ankle feel stable (can you balance here)? Does your knee want to collapse in? Is there a difference between sides?
b. Goals:
i. You want good lateral hip stability, so your knee should aim in the direction of your toes, not inward. This motion is controlled by your hips.
ii. Feel stable in your feet and ankles, keeping your weight even distributed in your foot tripod. It should not feel like all your weight is in your heel or forefoot.
These are just a few simple strength tests you can do right at home, either with the help of a friend or family member watching you, or by videotaping yourself to see how you’re moving. As you do these exercises, make sure to pay attention to which muscles you’re engaging!
I hope these tests help you gauge your strengths and weaknesses. Happy running!
For today’s newsletter, Coach Sage Canaday gives you 9 elements to consider as to whether you should be running or power hiking.
Altitude ☁️
As you climb to higher altitudes, running becomes more taxing because of the reduced oxygen levels. In these cases, power hiking is often the more efficient option to avoid overexerting yourself. Personally, I’ve found that when racing at higher altitudes, my breathing becomes a major indicator of when to switch from running to hiking. Once I start gasping for breath, I know it’s time to hike. This is especially important early in a race—if it’s a 100-mile ultra, for example, I don’t want to be struggling with my breathing too soon.
Steepness (Grade) 📈
The steepness of the trail is a major factor in deciding whether to run or hike.
5% Grade: This is the kind of incline you see on many highways or roads, and it’s typically runnable for most people. It’s gentle enough that maintaining a running pace doesn’t strain your muscles too much.
10% Grade: At this point, the hill is much steeper. Depending on your fitness level and how far into the race you are, you may start to feel the need to power hike. I personally enjoy running up moderate hills, but at a 10% incline, especially during a longer race, I start to seriously consider power hiking.
15% Grade: This is very steep, and most treadmills max out at this grade. For me, running a 15% incline for an extended period is exhausting, and I almost always switch to power hiking.
Race Distance & Duration 🏆
In shorter races, like a 30K or even a long training run, I might be more inclined to run up hills that I would hike in an ultra. But in ultra races—especially those that are 50K or longer—it’s critical to pace yourself. For races like a 100-mile or 160K ultra, you’re likely to be power hiking a lot of the uphills, particularly early on. In races like the Western States 100, you don’t want to burn out by running up every hill from the start. Power hiking early helps preserve your glycogen stores and saves your legs for later in the race when you really need them.
Fitness & Strengths 💪
Your personal fitness level and strengths as a runner play a big role in how much you can run versus hike. I consider uphill running one of my specialties, and I love runnable uphills. That said, even with strong uphill running ability, it’s essential to know when to switch to power hiking to avoid fatigue. Some runners may excel at downhill running, which means they can conserve energy on the uphills by hiking. For me, if the incline exceeds 20% (unless, say, it’s something like an all-out vertical K race), I’ll start power hiking to conserve energy.
Energy Conservation & Pacing ⏰
The most important thing to monitor when deciding whether to run or hike is your breathing and heart rate. I recommend staying in a zone where you can carry on a conversation—once you’re gasping for breath, you’re likely pushing too hard, especially early in a long race. I rely on this guideline during ultras: if I can’t talk comfortably, I know I need to slow down or start hiking. Power hiking helps me stay in the aerobic zone, avoiding spikes in heart rate that would deplete my glycogen too quickly and force me out of the fat-burning zone. This pacing strategy is essential in longer races like a 50K or 100-mile, where managing energy over the hours becomes critical.
Trail Technicality ⛰️
Another important factor is the technical nature of the trail. If the trail is smooth or paved, it’s easier to maintain a running motion, even on steeper inclines. But on rocky, uneven terrain, power hiking is often more efficient. If the trail requires you to step up or jump over obstacles, power hiking saves energy and reduces the risk of injury. I’ve had races where technical trails, especially with large rocks or steps, forced me to power hike even if I felt capable of running on a smoother trail.
Environmental Conditions ❄️
Sometimes, the environment dictates whether you run or hike. Icy or snowy conditions, for example, make running dangerous and inefficient. In such cases, power hiking is often necessary. I’ve also found that using poles can help in these situations—they provide extra balance and stability, allowing me to hike more efficiently without slipping or wasting energy.
Power Hiking Technique 📚
Like any skill, power hiking requires practice. It’s important to incorporate steep hill repeats, long uphill runs, and power hiking into your training, especially if you’re preparing for a mountain race. Personally, I like to include uphill tempo runs in my training, where I focus on sustaining a high intensity for 20-30 minutes. These workouts build my strength and help me feel confident in my ability to transition from running to hiking during a race. With consistent practice, you’ll find that you can hike efficiently on grades where you might have struggled before.
Fatigue & Bonking 😮💨
In longer races, fatigue is inevitable, and sometimes you’ll need to hike simply because running isn’t an option anymore. I’ve experienced this in races where, late in the event, I start feeling muscle fatigue, cramping, or even the early signs of bonking. If you’re low on fuel or dehydrated, power hiking can help you get through the tough moments without completely burning out. At this point, I focus on maintaining forward momentum, knowing that running could push me over the edge.
Personal Experience & Lessons:
In some races, I’ve seen other runners power hiking next to me while I continue to run, and they sometimes pass me. This highlights that power hiking can often be just as fast, if not faster, than running on steep inclines. It’s something that requires practice and confidence, but it’s also about understanding your own limits and strengths as a runner.
In shorter races (half marathon or less), you might push harder and run more of the uphills since you’re less concerned about bonking or glycogen depletion. In longer ultras, though, managing your energy is key. Avoid spiking your heart rate too high, and save your legs for later sections of the race when you’ll need every bit of strength to push through.
All in all, listening to your body, practicing your hiking technique, and staying mindful of your energy levels, you can make smart decisions about when to hike and when to run!
Our pawsitivity coach, Pacer, has been giving us advice for years, so we thought it was only right to turn the newsletter spotlight on her for this week!
Hey, come play!
Train less.
Don’t worry, you can run the same mileage.
We just want you to enjoy it more, stress a little less.
Why? Because when we’re always training, or running to get better, we might start attaching running and performance to our identity. And when we attach how we run to our identity, we can actually release stress hormones through our body that can negatively affect our health and well-being.
When we instead run to play, we can still practice good form and we can train to get faster and stronger, but we attach to the outcome less, which frees our mind and our body to move how it wants to, enables us to enjoy life and running more, and improves our health and well-being. (And honestly- I hesitate to say this so we don’t reattach, but this can actually improve performance.)
As an added bonus, research has now made it evident that exercise encourages neuroplasticity, making post run or workout a great time to focus on the thoughts you want to think and the beliefs you want to embody. Adding PLAY (described by David Hanscom, MD as a “mindset of curiosity, deep gratitude, listening, anticipation, awareness…”) can increase your sense of safety (reduce anxiety) and release oxytocin (love/bonding hormone) and potentially reduce inflammation!!!
Practical Application:
Still want to train for the fall race? Of course! We’ve got you.
Make play your INTENTION for runs. Even workouts are a chance to be curious, grateful, and present to your experience.
The race is your GOAL, secondary to your intention. Your joy is not dependent on the goal, but the goal is a helpful magnet to increase your desire to put joy and play at the forefront of your life.
It might take time to shift your brain from outcome based performance to play, and that’s okay. You might want to save this post and re-read it each week for a reminder.
*Play and work are two sides of the same coin. Mindset is the main difference between what you choose to experience.
Difficult workouts can be scary, but they don’t have to be.
Workouts that push us out of our comfort zones can often feel intimidating, especially when they involve endurance and speed. These types of workouts—long efforts mixed with speed—are often the ones that stir up the most fear among runners. The distance, the pacing, the uncertainty of how your body will respond can be daunting!
Today, Coach Sandi Nypaver gives you a few things to think about if you get too worked up before key workout or interval session.
The Root Issue:
When I talk to a lot of the athletes I coach, the conversation often turns to why certain workouts feel so daunting. Often, it’s because they’re worrying about things that are out of their control or they’re fixated on how much it’s going to hurt. It’s easy to get stuck in that mindset—focusing on the negatives.
But in my opinion, what it really comes down to is shifting that focus. Instead of thinking about the discomfort or the fear, frame it in a way where you instead recognize that this type of workout is exactly what’s going to propel you toward your goals. These sessions aren’t just tough physically; they build mental resilience, too.
It’s about seeing each challenge as a step forward, not just something to endure.
Take long run workouts as an example—they demand a lot of mental focus and require you to have confidence in your ability to stay strong as the workout progresses. That’s what I remind my athletes when we approach these longer sessions!
Mindset Matters:
It’s important to remember that you can feel strong during the workout, and when you do, it feels incredible. But so many people fixate on how bad they might feel, rather than focusing on how great they can feel when everything clicks. When you start to feel yourself slip into these thought patterns, it becomes even more important to focus on something good.
And if the workout doesn’t go as planned, that’s perfectly okay. One of the things I always tell my athletes is that failure isn’t a big deal—it’s part of the process. In fact, it’s expected. Every setback is an opportunity to learn and come back stronger.
Failing a Workout:
I’ll take the thought of failing one step further! If you’re not failing, you’re probably not pushing yourself hard enough or setting goals that truly challenge you. In my book, failing a workout is no big deal. It’s just part of the process when you’re trying to perform at your best. When a workout doesn’t go well, instead of dwelling on it, reflect on why. Were you too tired? Did something feel off physically? Or maybe you mentally sold yourself short before even starting?
All of these factors play a role, and when a workout doesn’t go as planned, you take what you can from it. Learn from the experience, and then move on. It’s part of the journey, and better workouts are always ahead. Over the years as a runner, I’ve experienced ups and downs, with plenty of failed workouts along the way. But that’s just part of the game. Each failure is a steppingstone toward the next success.
My challenge for you for, then, when facing a tough workout and not quite feeling up to it, is to shift your mindset. Instead of focusing on the pressure or the potential struggle, tell yourself, “I’m just going to give it a shot and do my best today.” By approaching it this way, you take off some of the mental burden. And who knows? If it goes well, it could end up being a huge boost for both your progress and confidence. Just giving it a try could be all you need to turn things around.